
Pickleball Backhand Flick: Technique for Max Pace and Topspin
The backhand flick is a powerful, yet compact offensive weapon in pickleball. Typically executed at the height of the net or just below, it allows players to rapidly accelerate the pace of play and inject heavy topspin into the ball, either surprising or overwhelming opponents. Mastering this shot can turn a neutral dink exchange into an immediate winning opportunity.
Proper Technique: Step-by-Step
Precision in preparation and execution is vital for a successful backhand flick.
1. The Stance and Setup
Use the Full Kinetic Chain: Do not stand squarely. Start with your feet turned slightly outward. This allows you to utilize your core rotation for power and control, rather than relying solely on the wrist.
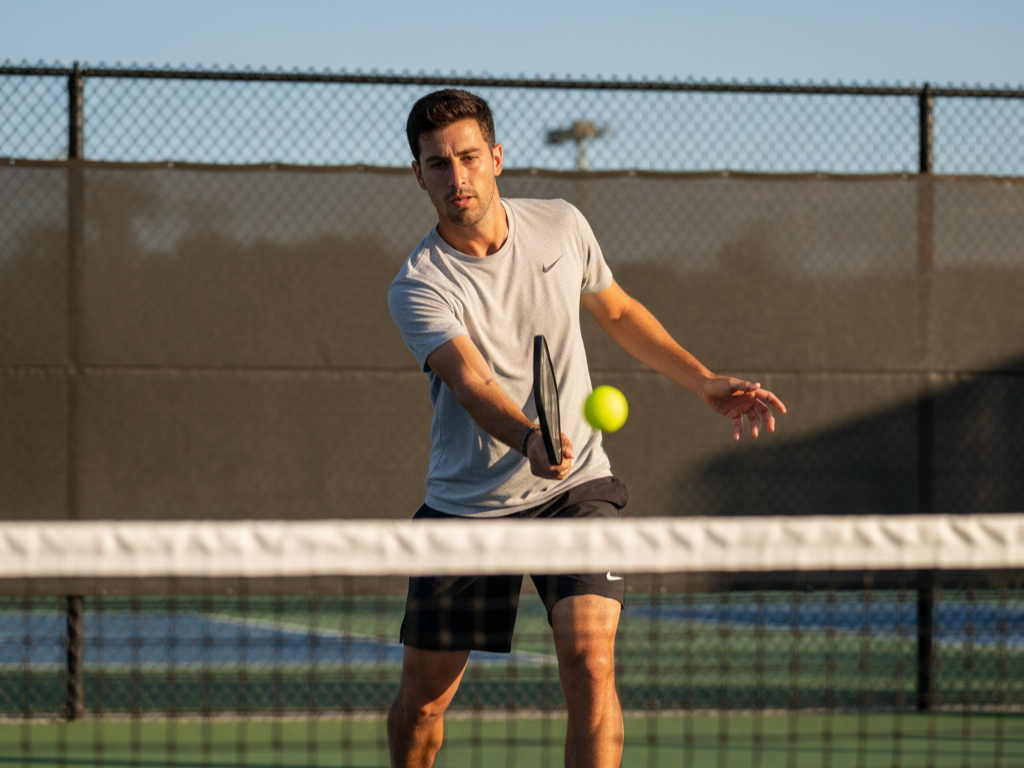
The Paddle Position: Prepare by holding your paddle tip down, with your elbow pointing up.
Compact Backswing: Bring the paddle in front of your body. The backswing must be compact to ensure speed and disguise.
2. The Strike Zone
The backhand flick is highly effective only within a specific "strike zone".
Target Balls: Focus on balls that are above your knees but below shoulder height and positioned in front of your body.
Avoid: Outside of this zone, control and efficacy drop sharply; save the shot for well-positioned balls.
3. The Swing and Contact
The Flick Motion: Initiate the shot by flicking your wrist and forearm up and forward. This should be a rapid, low-to-high motion.
Generating Topspin: The key is to “brush” up the back of the ball. This action generates both speed and the necessary topspin.
Paddle Angle: Keep the paddle face nearly vertical. Swing up at approximately a 45-degree angle. Avoid "painting the side" of the paddle, which kills topspin and depth.
4. The Follow Through
Directional Finish: Follow through in the direction of your intended target.
Target Options:
Aim high and deep toward the baseline for maximum pressure.
Aim for a sharp angle toward the sidelines to force maximum reach and errors.
Common Mistakes to Avoid
A poorly executed flick often does more harm than good. Be mindful of these pitfalls:
Flicking solely from the wrist: This results in lost control and pace. The power must come from the whole arm and core.
Using the flick shot on low balls: Save the flick for balls positioned well in front of you and inside the ideal strike zone. Low balls are generally better for defensive dinks.
Neglecting the setup: If the paddle isn’t ready (tip down, in front, elbow up), the shot loses its sharpness and crucial surprise factor.
Drills to Master the Flick
Consistent practice is the only way to make the flick a reliable, instinctive shot.
1. Poke Flick Drill: Start with basic, low-power poke movements to build comfort and wrist control. Progress to executing a compact flick against slow dink feeds from a partner.
2. Baseline Target Practice: Set up court markers (or cones) deep in the baseline corners. Practice the low-to-high topspin flick, repeatedly aiming deep or at sharp angles, focusing on control and accuracy.
3. Speed-Up Placement Drill: Practice striking flicks at various surprise targets (opponent’s body, the sideline, the middle) over the net. Focus on matching the rapid wrist action to your target to practice the element of surprise.
Attack Zones
Knowing when to apply maximum aggression versus controlled topspin is key to strategy.
"Green Zone" (Chest Height and Above): Go for maximum aggression and pace, as these shots are easier to strike forcefully and often result in clean winners.
"Yellow Zone" (Thigh to Chest Height): Use controlled topspin to lift the ball over the net. The topspin will cause the ball to dip fast into tough locations for opponents, setting up the next attack or forcing an error.